
1. Purpose of the program
DirColors is a graphical interface for editing the ~/.dircolors file. This file defines the colours used for directories, executable files, links, archives, images and other file types in colour-capable terminal output.
ls. They normally do not change icon or text colours in the Nemo file manager.2. Program interface
The upper part of the main window contains the most important functions:
| Element | Function |
|---|---|
| Open | Load an existing .dircolors file. |
| Save | Save the current settings to a file. |
| Apply | Apply the generated configuration. |
| Defaults | Restore the program's built-in starting values. |
| File types | Colours for directories, files, links, programs and device files. |
| File extensions | Colours for file patterns such as *.py, *.pdf or *.zip. |
| Preview | Check the selected colours before saving. |
| Settings | Manage the file path, language, system defaults and shell command. |
The status bar at the bottom shows the loaded file. On the right, the interface theme detected by the application is displayed, for example Mint-Y-Aqua.
3. Editing file types
The File types tab contains general entries that do not depend on a particular file extension.
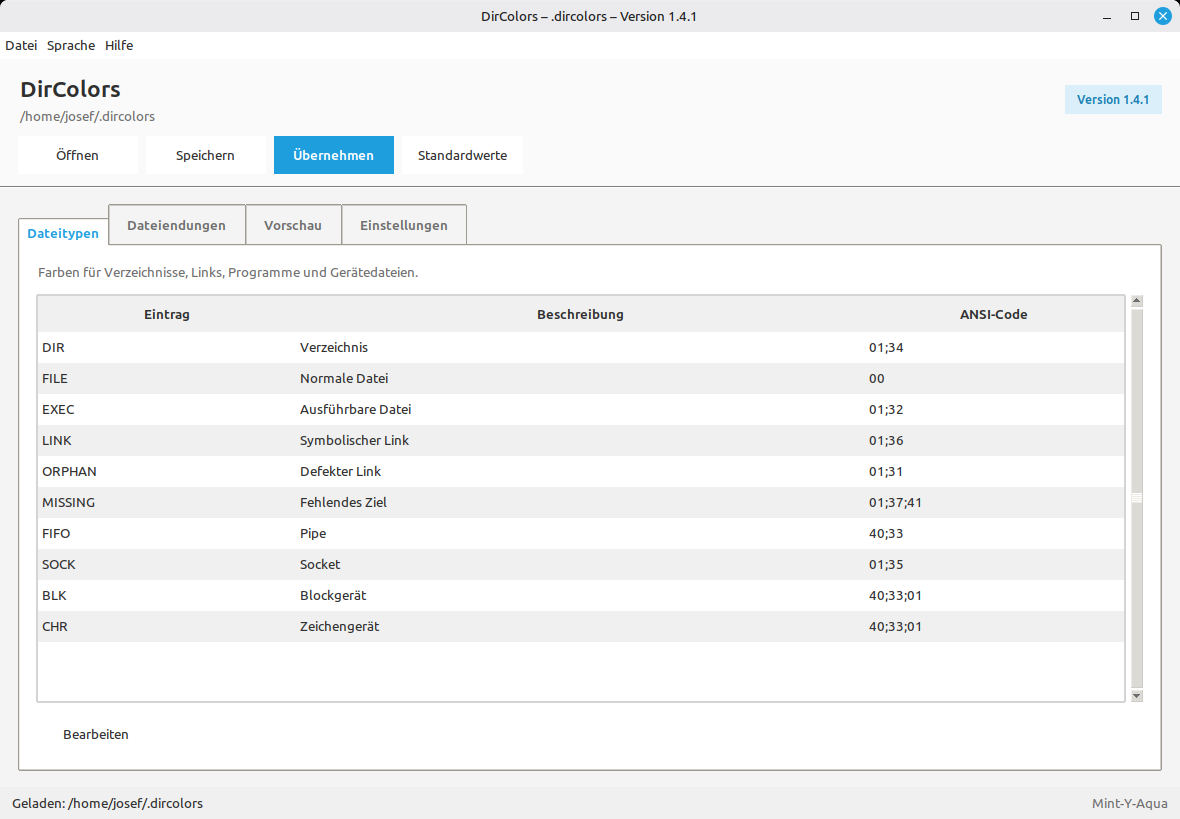
| Entry | Meaning |
|---|---|
DIR | Directory |
FILE | Regular file |
EXEC | Executable file |
LINK | Symbolic link |
ORPHAN | Broken symbolic link |
MISSING | Missing link target |
FIFO | Named pipe |
SOCK | Socket |
BLK | Block device |
CHR | Character device |
- Select the required entry in the table.
- Click Edit.
- Set the foreground, background and text attributes.
- Confirm the change with Apply.
4. Managing file extensions
The File extensions tab defines colours for specific file extensions or file patterns.
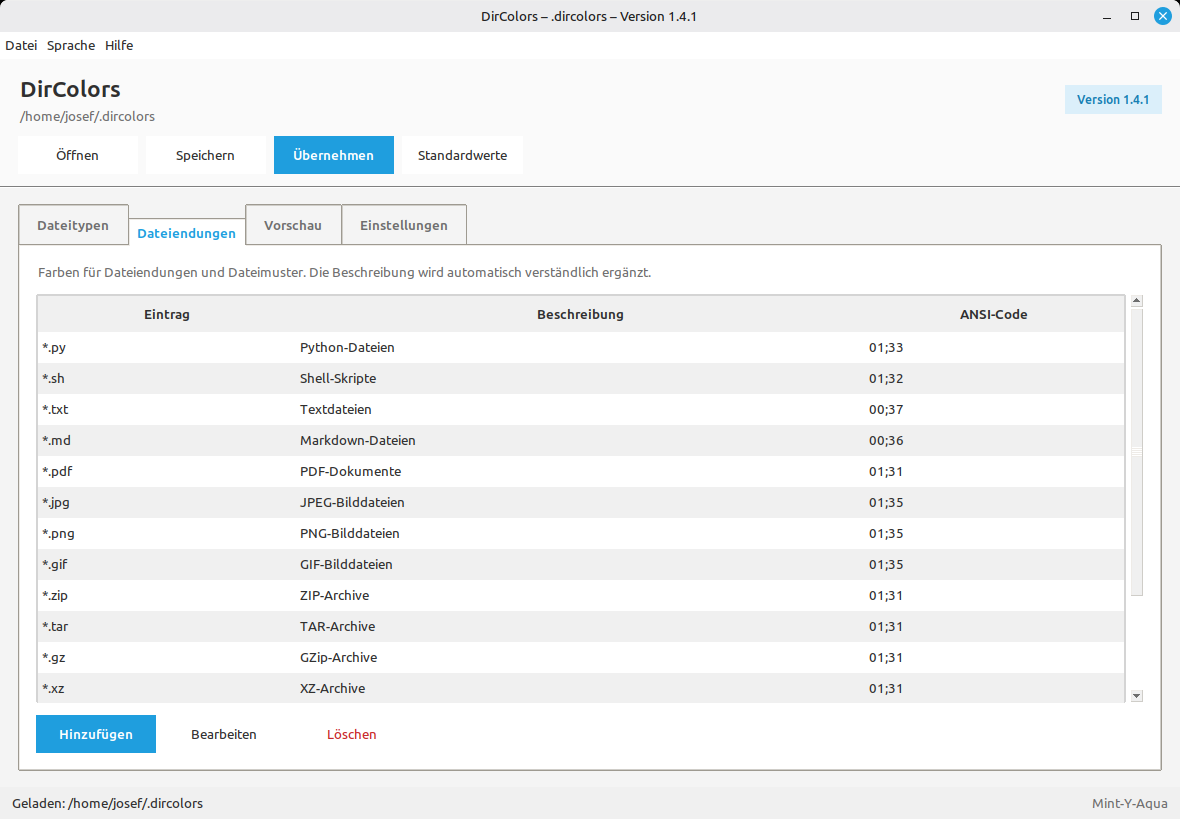
Adding a new entry
- Click Add.
- Enter a pattern in the Entry field, for example
*.py. - Enter a clear description.
- Select colours and text attributes.
- Save with Apply.
Changing or deleting an existing entry
Select the entry and then choose Edit or Delete. Before deleting it, check whether the entry may still be required later.
*.extension, for example *.jpg. This makes the rule apply to every file with that extension.5. Editing an entry
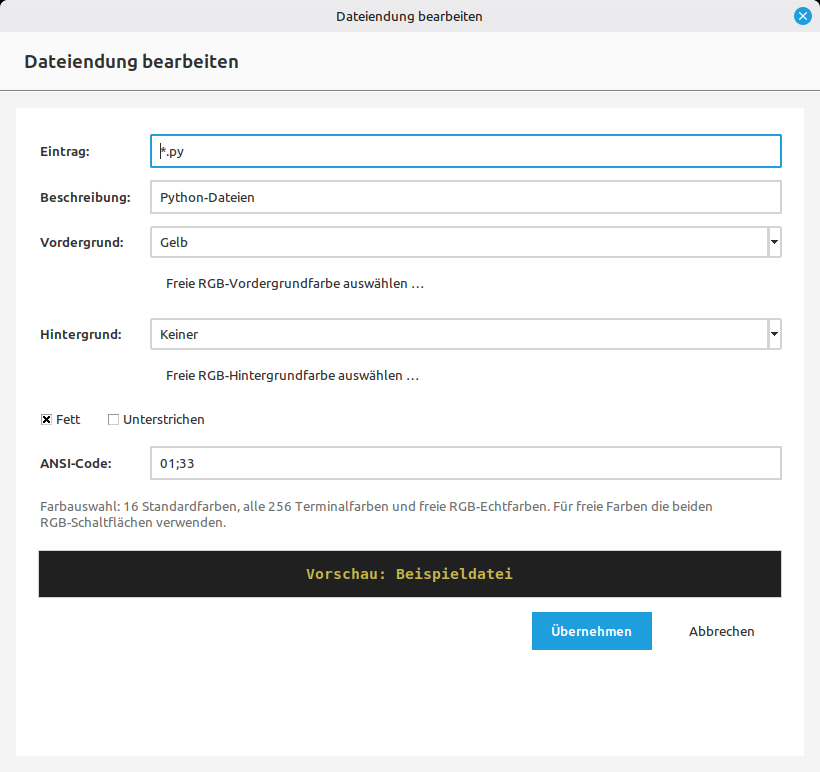
*.py entry.| Field | Description |
|---|---|
| Entry | File pattern, for example *.py. |
| Description | Readable name, for example “Python files”. |
| Foreground | Text colour from the standard or 256 terminal colours. |
| Custom RGB foreground | Select an individual true colour. |
| Background | Background colour or “None”. |
| Custom RGB background | Individual background colour. |
| Bold | Makes the file name stand out more strongly. |
| Underlined | Underlines the file name. |
| ANSI code | The colour code generated from the settings. |
| Preview | Immediately shows how the entry should appear in the terminal. |
Apply saves the change in the program's current state. Cancel closes the dialog without changing the entry.
6. Using the preview
The Preview tab displays the colours together. Pay particular attention to sufficient readability.
- Avoid light text on a light background.
- Avoid dark text on a dark background.
- Do not use very similar colours for different important file types.
- Also test the result in a real terminal because terminal profiles may reproduce colours differently.
7. Settings
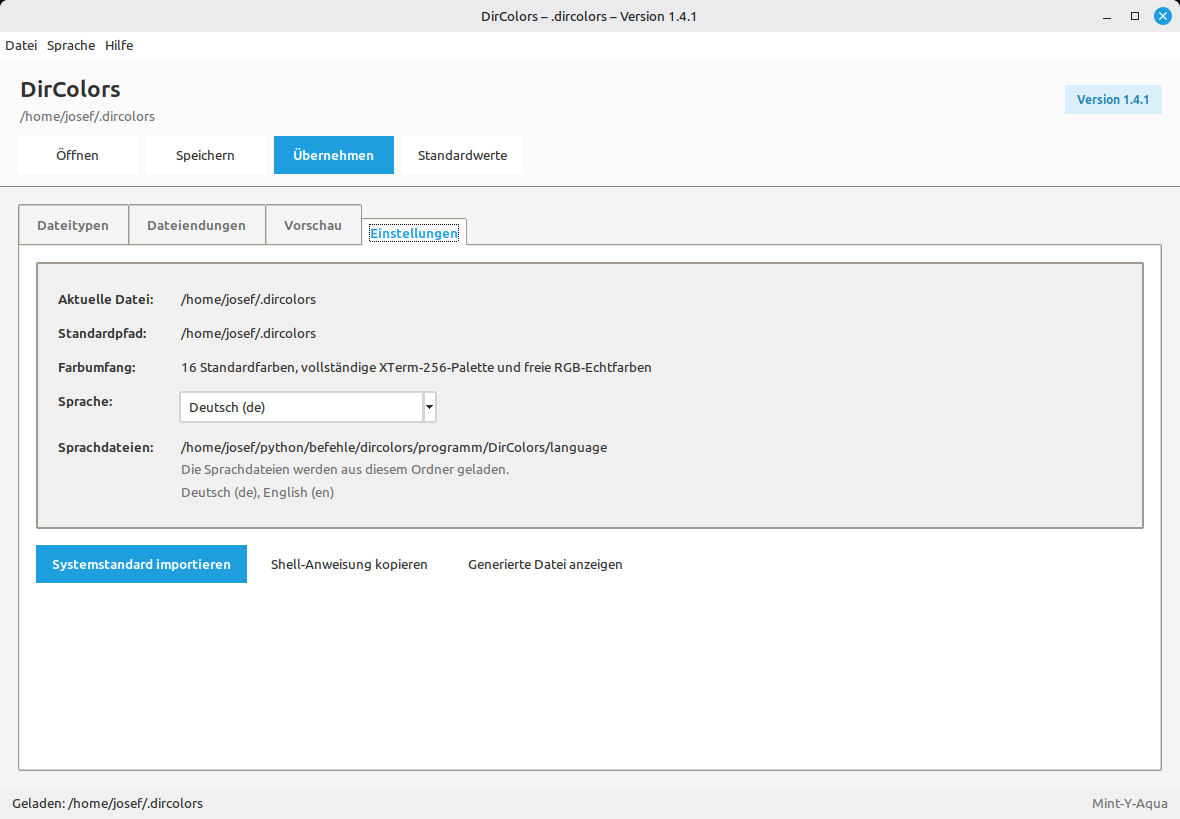
| Setting or button | Function |
|---|---|
| Current file | Shows the configuration file that is currently loaded. |
| Default path | Usual location of the personal file, for example /home/josef/.dircolors. |
| Colour range | Support for 16 standard colours, the XTerm-256 palette and custom RGB colours. |
| Language | Selects the program language. |
| Language files | Folder from which the available translations are loaded. |
| Import system defaults | Loads the starting configuration supplied by the system. |
| Copy shell command | Copies the shell command required for activation to the clipboard. |
| Show generated file | Opens a view of the file generated by DirColors. |
8. Recommended workflow
- Load a starting point: Open an existing file with Open, or create a new basis with Import system defaults.
- Adjust file types: Set colours for directories, programs, links and device files.
- Add file extensions: Add custom rules such as
*.py,*.shor*.pdf. - Check the preview: Verify readability and contrast.
- Save: Save the file in the required location, usually as
~/.dircolors. - Apply: Apply the configuration in DirColors.
- Configure the shell: Use Copy shell command and add the command to the configuration of the shell as described by the program.
- Reopen the terminal: Open a new terminal window and test the colour output.
9. Notes and troubleshooting
Colours do not change in the terminal
- Check that the correct file was loaded and saved.
- Click Apply after saving.
- Check the command produced by Copy shell command.
- Open a new terminal or reload the shell configuration.
- Check that coloured terminal output is enabled.
A file pattern is not recognised
Check the pattern for typing errors. A file extension normally uses *.extension. Separate entries may be necessary for different spellings, for example *.jpg and *.JPG.
The preview looks different from the terminal
Terminal profiles can alter colours or display only a limited colour range. The final check should therefore always be performed in the terminal that will actually be used.
Backup before major changes
Before making extensive changes, create a copy of the existing file, for example with a name such as .dircolors.backup.
Documentation based on the interface of DirColors version 1.4.1.